
The first thing that is needed to get started with software defined radio (SDR) is a RTL-SDR dongle.
There are different models and types of SDR dongles but the most common (and the cheapest) is ones based on the RTL2832U chipset.
The RTL2832U chipset was originally used for TV dongles. There are new chipsets coming out but I thought this would be a good place to start since these units are cheap ($25 dollars) and there is lots of documentation on them.
This is the unit I ordered but any SDR dongle should work the same as I move through setting it up.
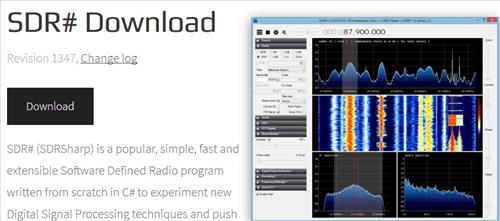
After getting a dongle the best place to start is with the software SDR# pronounced “SDR Sharp”.
It is recommended to have a computer that is at least a Dual core 3 GHz on their requirement page.
SDR# is said to be the easiest software to begin with although I still found there to be a learning curve, and stumbled a few times getting it setup and working.
To get SDR# working first download the software package here.
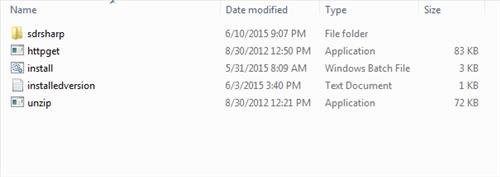
Once the files download they will need to be extracted. I recommend creating a folder to extract them to since they don’t create one folder for all the files to be in.
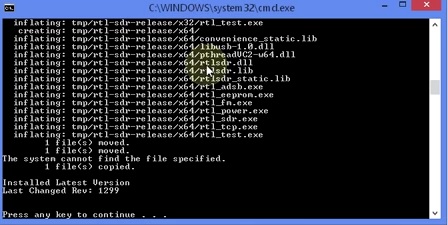
After the files are extracted run the install.bat file. A DOS box will come up and automatically download the necessary files and install them.
Installing the drivers for the SDR dongle
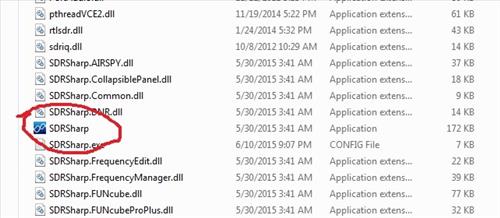
Click the SDRSharp folder at the bootom is a program called Zadig this is what is used to istall the drivers for the dongle.
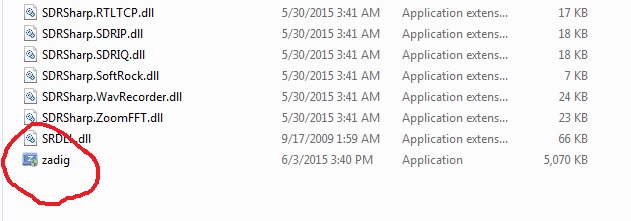
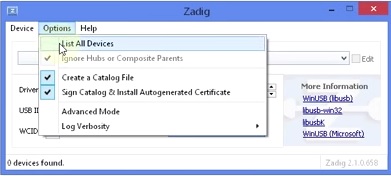
The Zadig box will come up. to be able to select your dongle be sure it is plugged into a USB port. Then click…
Options–>List all Devices
The dongle should now be displayed in the drop down box.
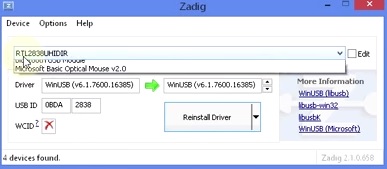
After your dongle is selected click on Install Driver.
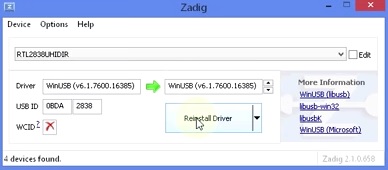
The driver should now be installed and SDR# is ready to be used.
Using SDR#
SDR# is not installed to a computer but run as a instance when needed.
To run SDR# simply click on it Icon in the extracted SDRSharp folder.
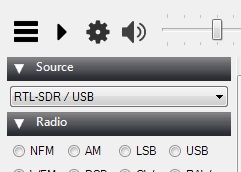
The SDR# controls will come up here are their basic functions.

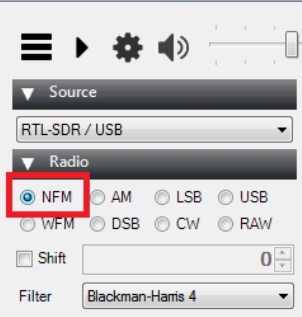
At the left side under Source select RTL-SDR / USB for the dongle to input information.
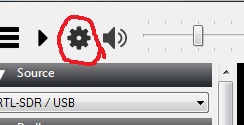
The next thing to do is at the top left set the RF Gain higher. I had a problem with this at first and thought the antennas were no good but the RF gain can be increased by clicking the settings Icon and moving the RF Gain up.
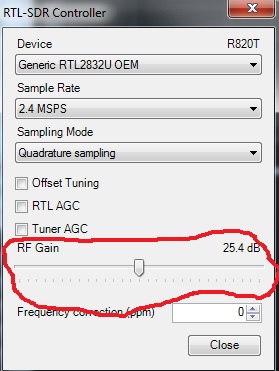
The RF gain can always be adjusted later so dont max it out at the start. I leave it in the middle unless I need a better signal.
Finding that first Signal… Weather Updates.
By pressing the play button at the top left the SDR dongle should input data into SDR#.
The first thing we will do is listen to weather updates that are transmitted in a loop around the United States.
To find which frequency is used in your area follow this link.
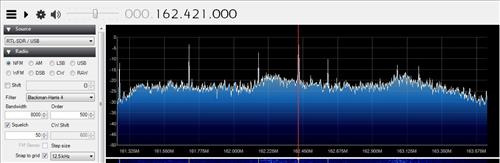
Once you have the right frequency for your location it can be imputed by using the mouse on the top frequency bar.
Select NFM for decoding type
Weather updated should now come through as they are repeated in a loop.
Troubleshooting
Be sure the sound bar at the top of SDR# is turned up loud enough to hear at least static over the speakers.
If you dont hear any sound be sure Audio Output (Under Audio) is set correctly for your setup.
Sometime the signal doesn’t come through at the exact frequency for example my county has the frequency listed as 162.425 MHz but a clear signal came through at 162.421 MHz for me.
If the signal is weak increase the RF Gain under the setting tab at the top left of the window.