Asus routers are very popular and widely used for connecting multiple devices to the internet and WiFi.
A new router will need to go through a quick setup for WiFi, and to connect to the modem.
The modem is what an internet service provider gives customers and is separate from the router.
Modems can vary in features, but most will have a single Ethernet port on the back for the router to connect to.
The router manages connections to allow multiple devices to connect to the WiFi or Ethernet and get online.
An Ethernet network cable is plugged in between the cable modem and router on the WAN port.
A network cable also is plugged into a computer that is used to set up the router.
Once the wired connection is made, WiFi names and passwords can be added.
Below are the full steps, along with pictures, to set up a new Asus router.
Keep in mind while the designs and layouts can change, the same steps will work for all Asus routers.
Things Needed to Setup an ASUS Router
- Two Ethernet Network Cables
- Computer
- Asus Router
- A modem from an Internet Service Provider
Steps to Setup an ASUS WiFi Router
- Connect an Ethernet Network Cable to Modem
- Connect an Ethernet Network Cable to a Computer
- Power on the Asus Router
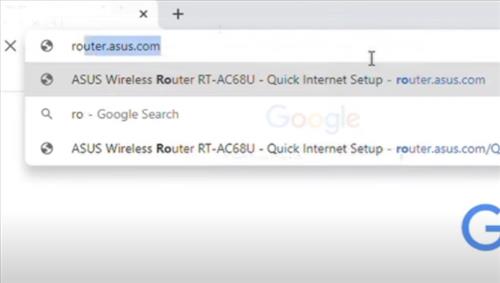
- Go to the computer, open any browser such as Chrome, and type in router.asus.com
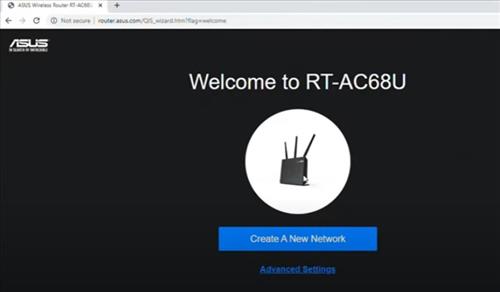
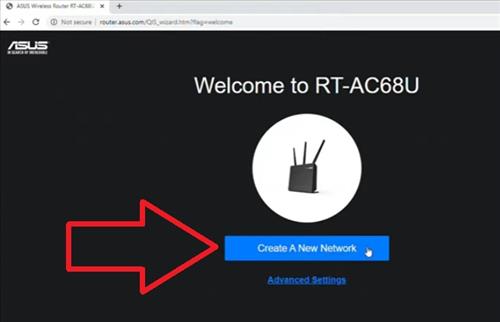
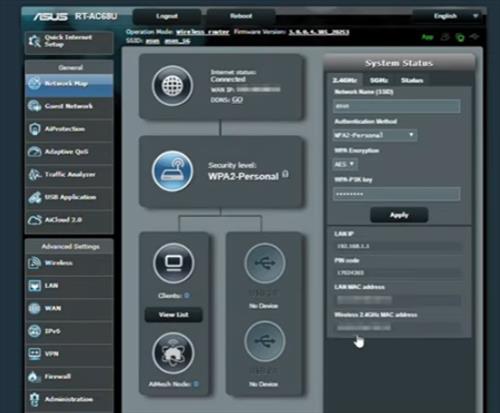
- The Asus Welcome page should display
- Select Create A New Network
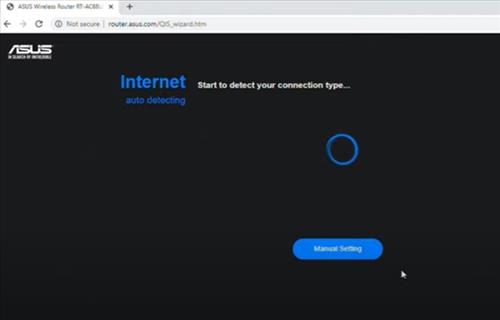
- The router will find the Network connections
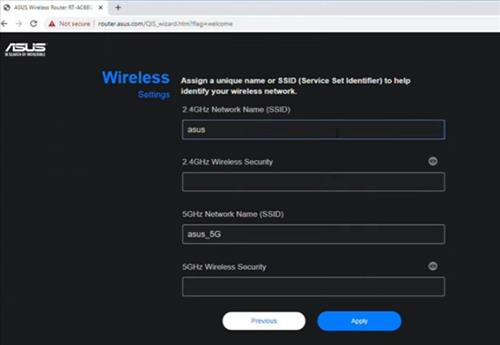
- Enter the SSID (WiFi name) and Passwords for the WiFi (Both 2.5GHz and 5GHz).
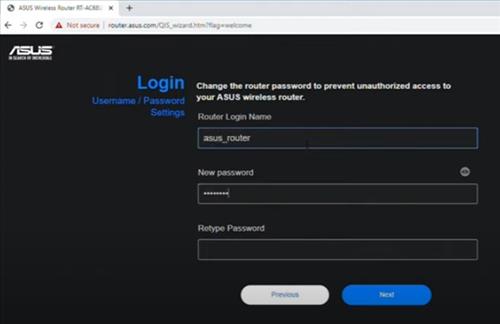
- Enter a new router login and password and click next
- The setup is now complete. the next page will show the status of the connections.
- The WiFi can be tested with a smartphone or similar by connecting to the WiFi.
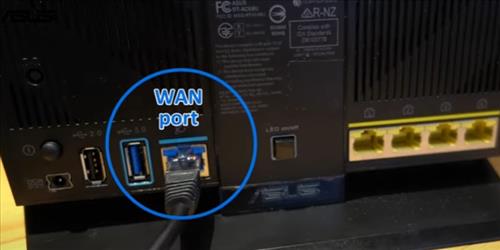
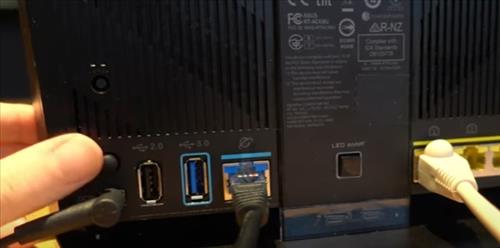
The first step is to connect an Ethernet network cable between the cable modem and the Asus router.
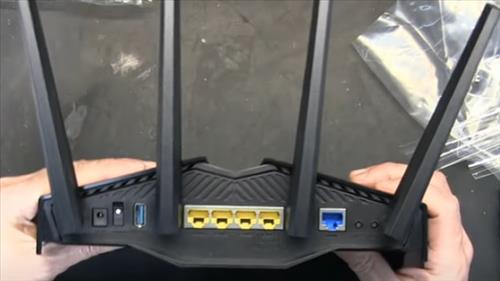
The port on the Asus router labeled WAN (Wide area network) is the connection to the cable modem.
Asus routers have different designs and layouts, but the WAN port will be on the back of the unit.
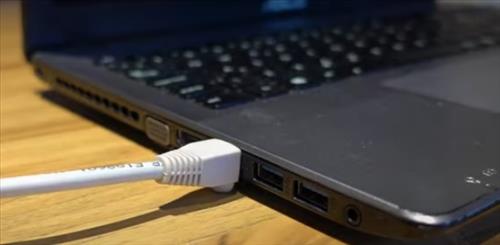
Connect another Ethernet network cable to a computer’s Ethernet port.
A laptop is the easiest to use, but any computer will work.
Connect the other side of the cable to any LAN (Local area network) port on the back of the router.
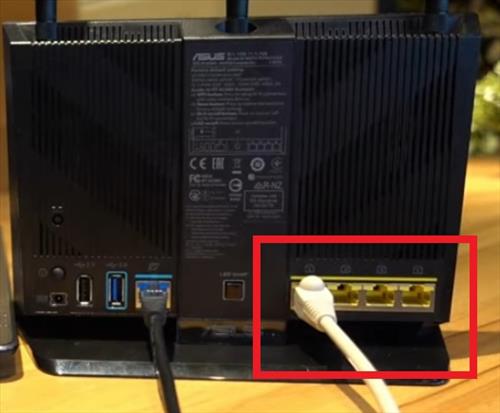
Again designs and layouts can be different, but the LAN port will be on the back of the unit.
There are usually 4-5 LAN ports on the back of an Asus router, and any LAN ports can be used.
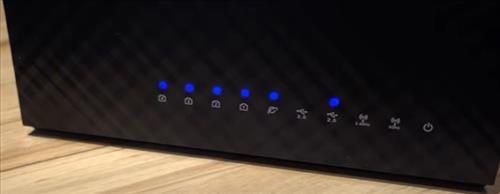
Plug in the power adapter and press the power button to power on the router.
The led lights will flash, and some stay lit when it powers on.
Why is my ASUS router not connecting to the Internet?
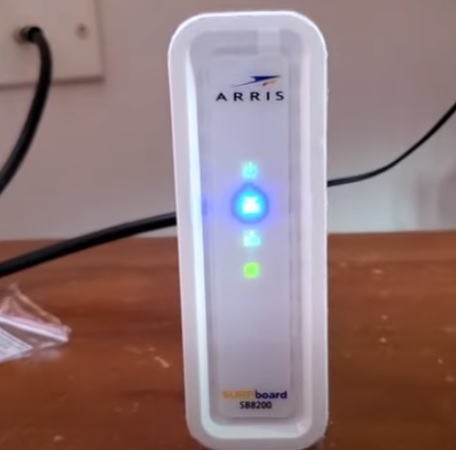
If the router does not connect to the internet check the modem for any flashing lights.
The lights should be solid for both the WAN connection to the internet service provider and the LAN connection to the router.
Check the connections at the cable modem, including the coaxial line and Ethernet cable.
Be sure the Ethernet cable is plugged in correctly from the modem to the WAN port on the router.
Sometimes both devices need to power off and on reset to start working.
Are Asus routers easy to set up?
Yes, Asus routers have a quick and easy setup that is not too technical.
Most DIY-type people can setup a router in 5-10 minutes.